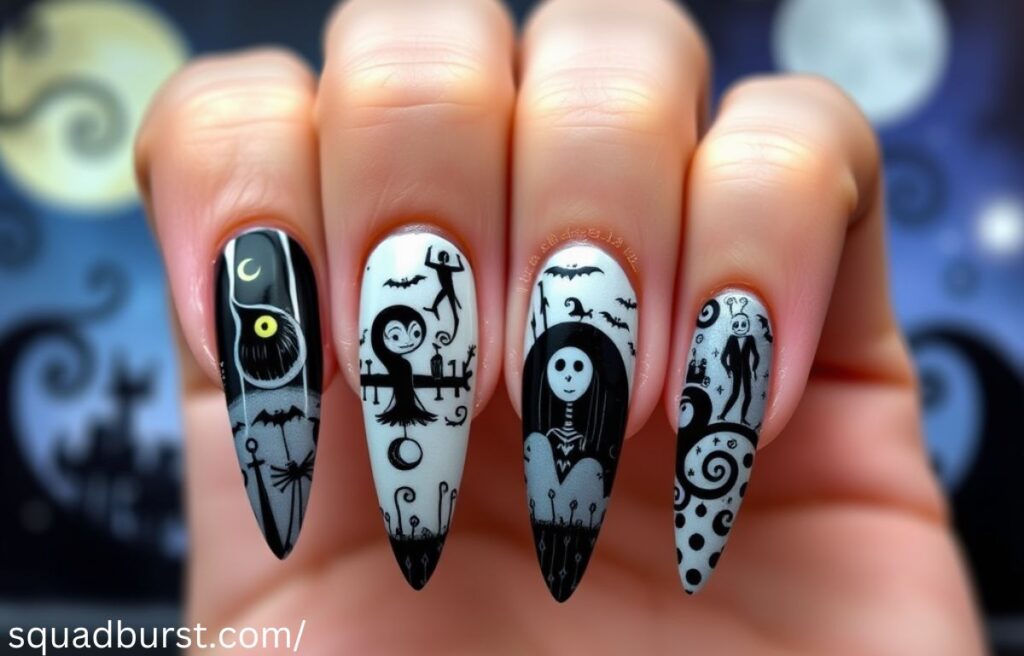
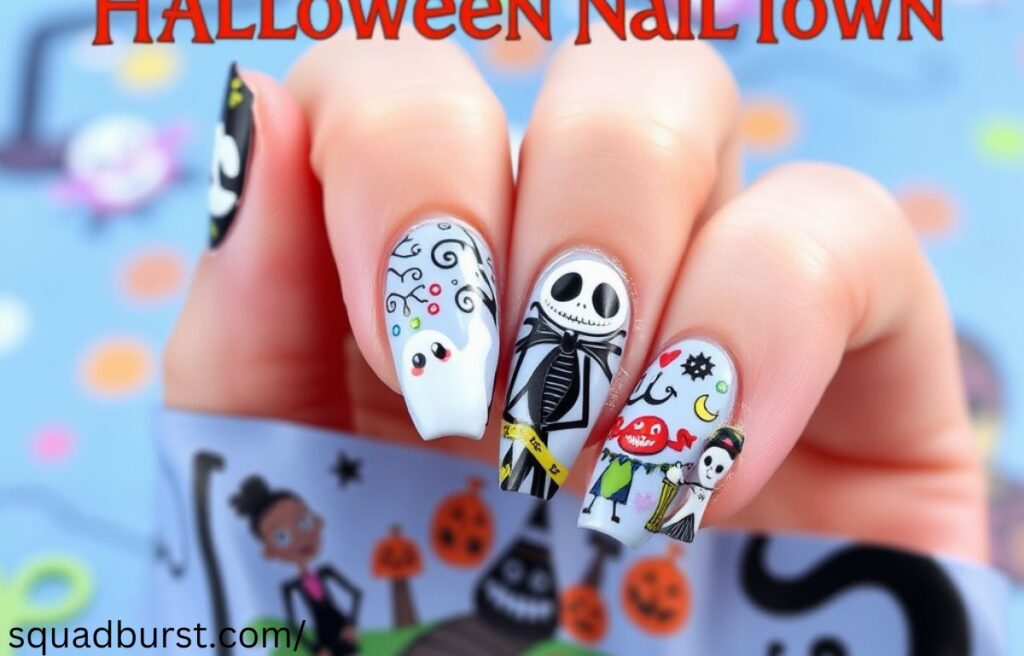
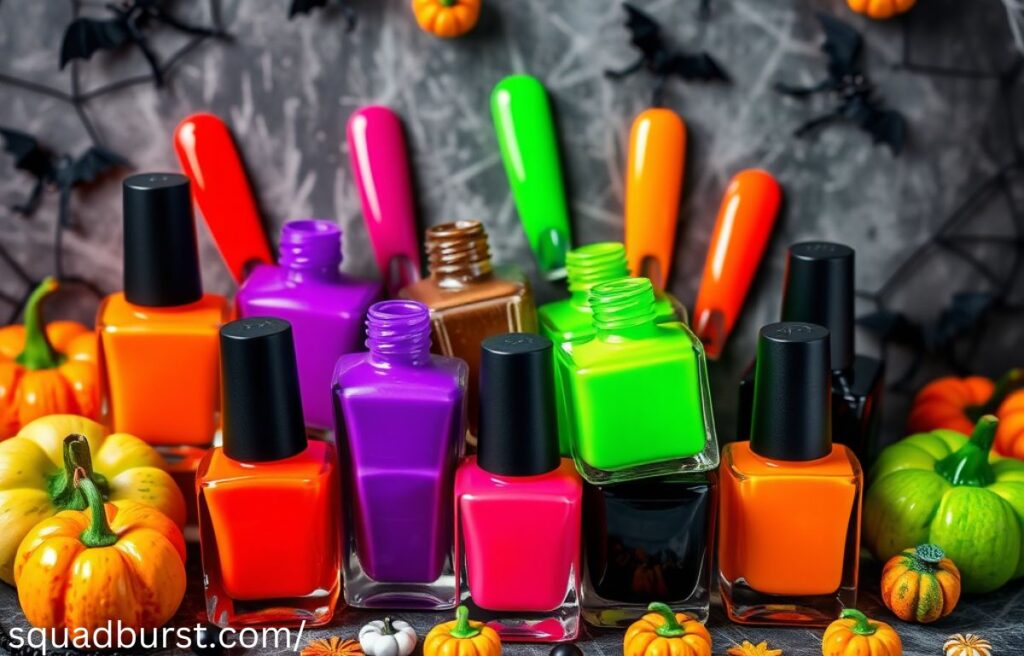
Hauntingly Stunning: 30 “The Nightmare Before Christmas” Nail Designs to Spook and Slay! is a collection of creative, spooky, and festive nail art ideas inspired by Tim Burton’s iconic film. These designs capture the essence of Halloween and Christmas in one, combining eerie charm with a touch of whimsy. From Jack Skellington’s skeletal face to Sally’s stitched charm, these designs bring the beloved characters and scenes to life on your fingertips.
Imagine wearing Jack Skellington’s face or Sally’s patchwork design on your nails—bringing Halloween Town to your hands! With these Nightmare Before Christmas nail designs, you’ll instantly stand out at any Halloween party or holiday event. Whether you prefer sharp, dramatic stiletto nails or subtle natural nails, there’s something for everyone.
Hauntingly Stunning: 30 “The Nightmare Before Christmas” Nail Designs to Spook and Slay! is the perfect way to blend spooky fun with creativity. These designs will not only capture the spirit of Tim Burton’s universe but will also leave you feeling festive, spooky, and totally stylish all season long. From intricate details to bold color choices, you’ll find the ultimate way to express your love for this timeless holiday classic.
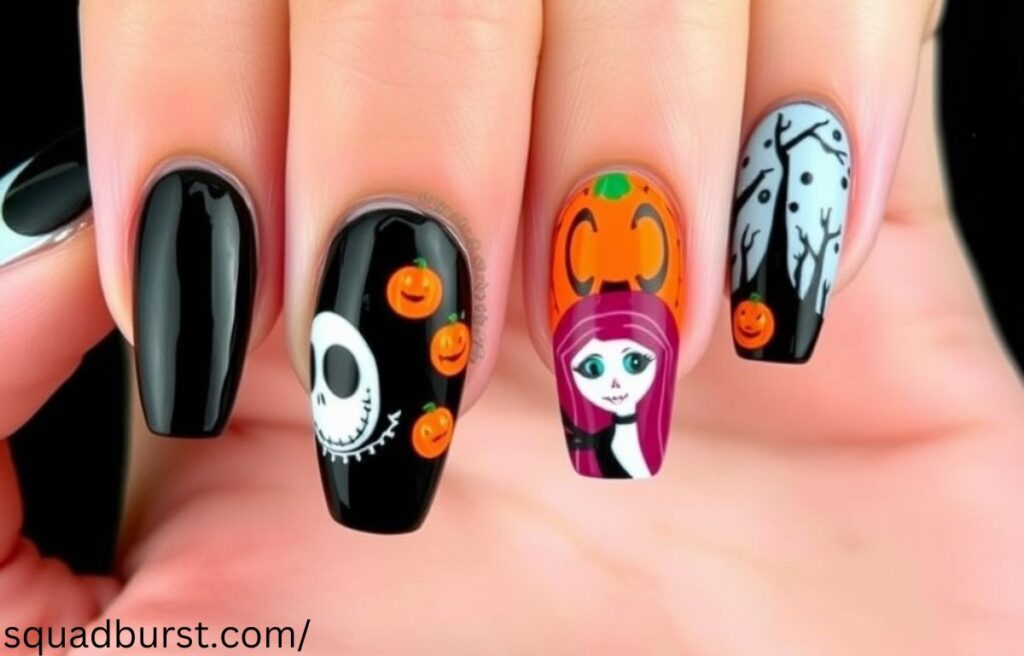
1. Coffin Nails with Holiday Icons: Combining Halloween and Christmas Charm
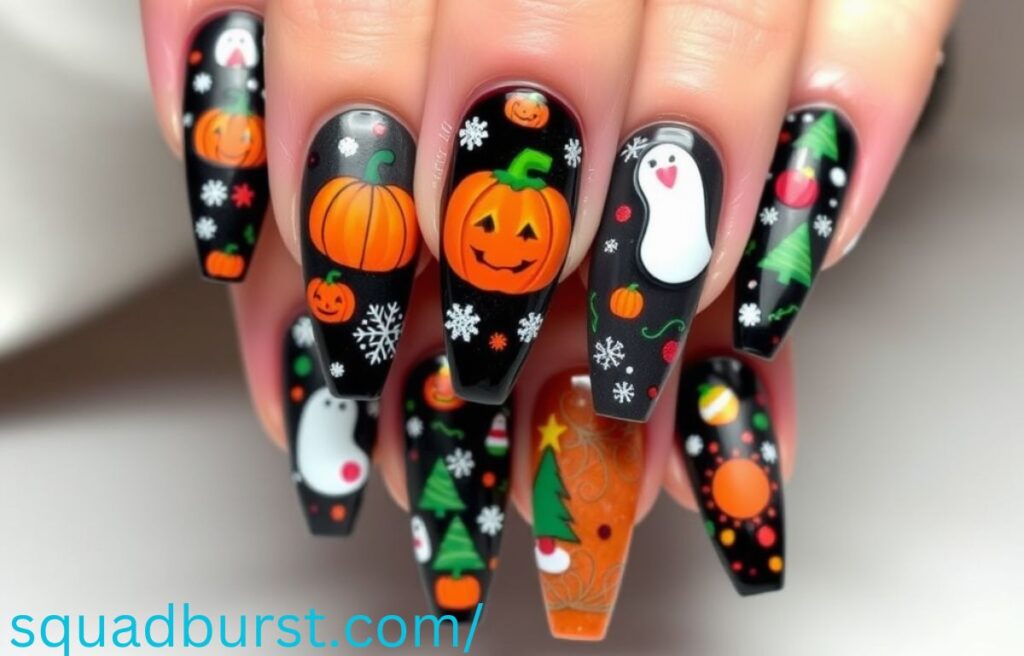
Coffin nails provide the perfect canvas for combining both Halloween and Christmas motifs in your nail art. This style allows you to showcase Jack Skellington as both the Pumpkin King and as Santa.
Key Design Tips:
- Designs: Create Halloween and Christmas nails on each finger, such as Jack’s face on one, a pumpkin on another, and a Christmas tree on the next.
- Shape: Coffin nails give you plenty of space to incorporate detailed holiday motifs.
- Finish: Use a clear varnish nails finish for a sleek and shiny effect.
2 Unique Nail Art Decals for Quick & Easy Nightmare Designs
If you’re not confident with freehand painting, nail art decals are an excellent way to get the look of detailed Nightmare Before Christmas nail designs without the hassle. Decals can be easily applied, allowing you to quickly transform your nails.
Key Design Tips:
- Designs: Choose Jack Skellington faces, spooky pumpkins, or Halloween Town symbols.
- Finish: Top with a clear varnish nails finish to seal in your design and make it last.
Pro Tip: Decals are also a great way to incorporate Sally’s stitched charm nails and other detailed elements with precision.
This concludes your expanded blog post, now with additional unique headings and design tips for a complete guide on The Nightmare Before Christmas Nail Designs. With these diverse options, there’s a design for every type of nail artist to enjoy this spooky season. Whether you’re looking for a bold, dramatic statement or a minimalist approach, you’ll find the perfect Halloween nails here to spook and slay!
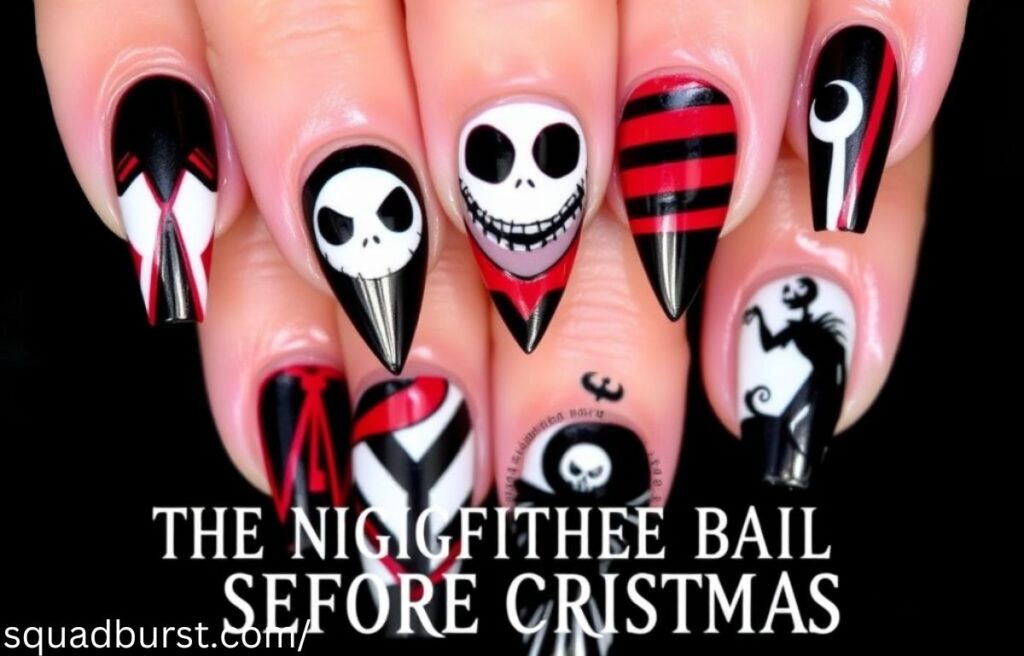
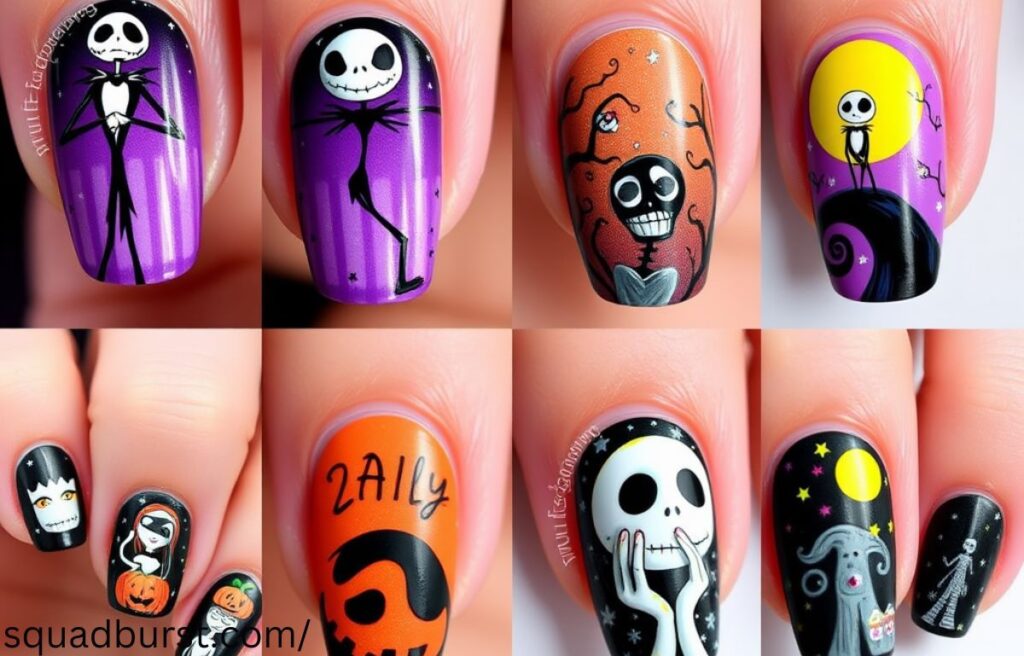
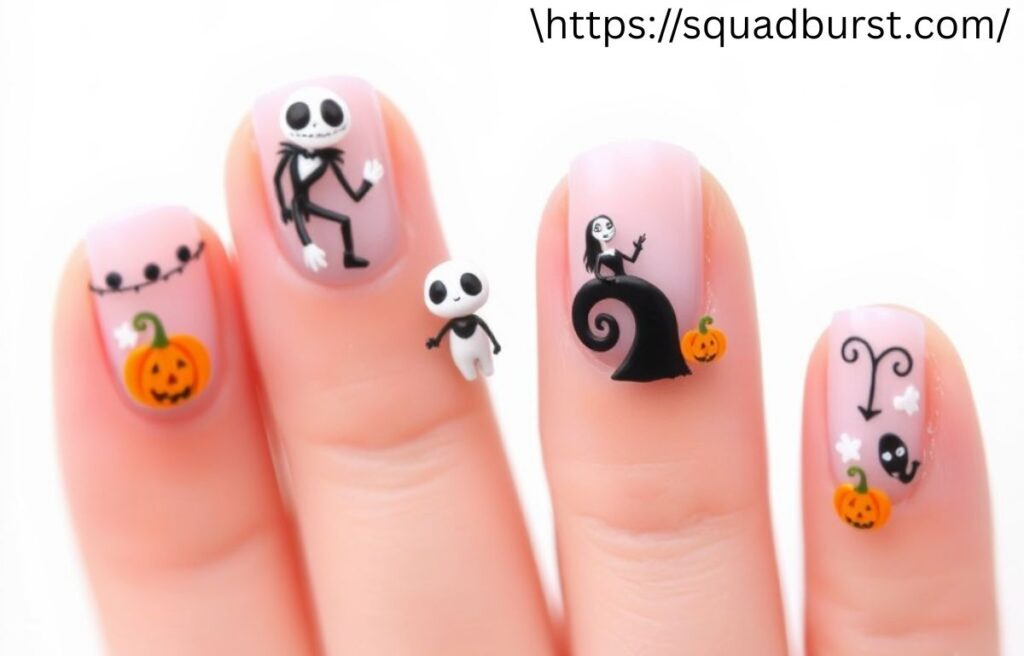
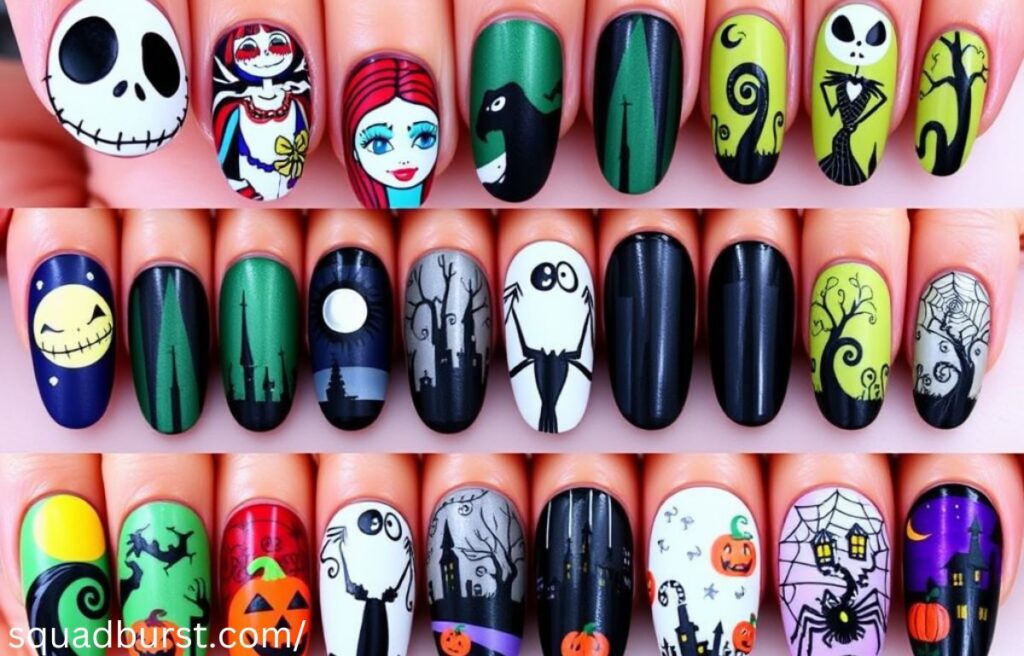
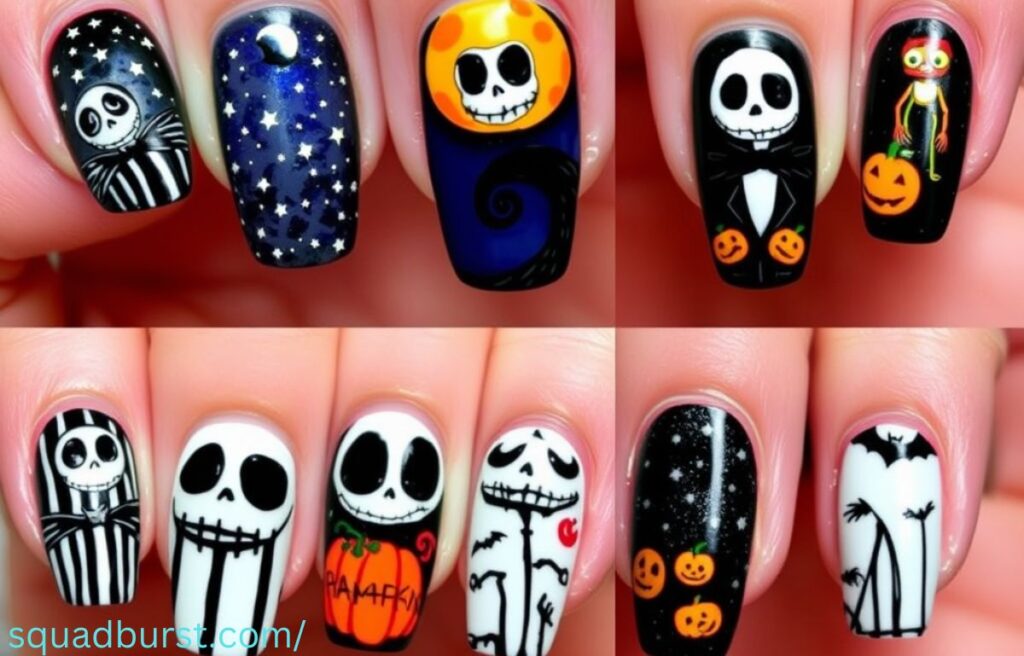
3. Jack Skellington Nail Art: Iconic Faces & Stripes
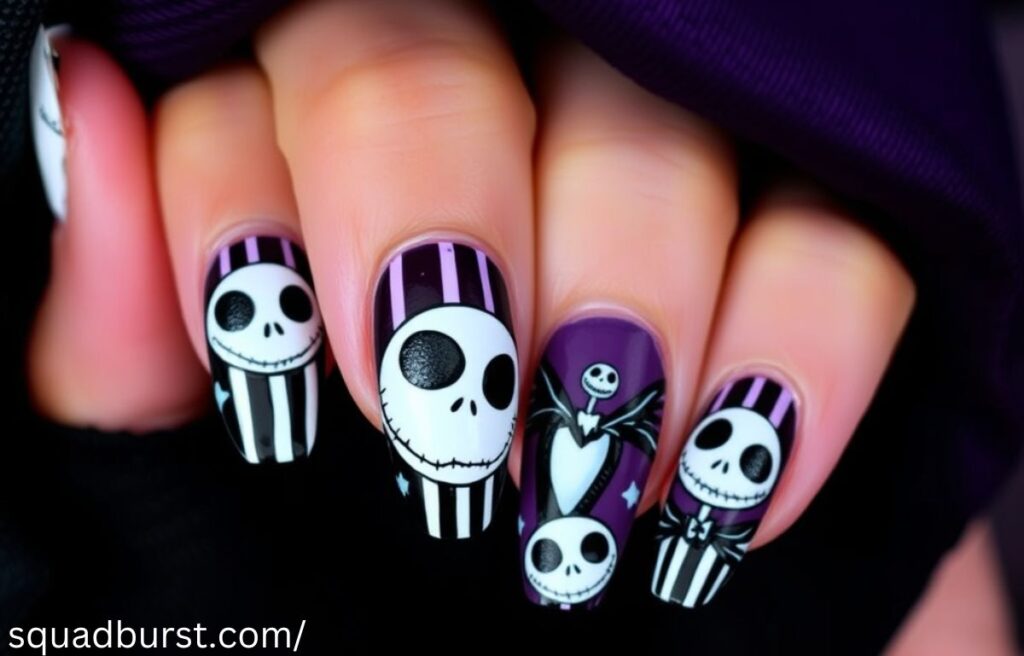
Jack Skellington, the Pumpkin King, is the face of The Nightmare Before Christmas, making him the perfect focal point for your nail art. His iconic skeletal face can be recreated in various ways on your nails.
Key Design Tips:
- Designs: Paint black and white nails featuring Jack’s iconic skull. You can use nail art decals or hand-paint his face with a matte top coat nails finish for a sleek look.
- Base Color: A bold black base coat helps Jack’s face stand out, or go for a monochrome nail style for a minimalistic approach.
Pro Tip: If you want to go the extra mile, use a glittery purple nails finish to add a subtle yet eye-catching twist to your Jack Skellington nail designs.
4. Sally-Inspired Halloween Nails: Bold & Colorful

Sally, the beloved ragdoll with stitched-up skin, provides a perfect opportunity for Halloween-inspired nail designs. Her multicolored patchwork dress can be translated into vibrant nail art that pops.
Key Design Tips:
- Designs: Create short almond nails with patchwork designs using Halloween nail polish colors like blue, red, purple, and yellow.
- Finish: Use a matte top coat nails finish for a modern and stylish effect.
Pro Tip: You can also incorporate Sally’s stitched charm nails, adding subtle stitching designs with a thin brush or nail art decals.
5. Oogie Boogie Nail Designs: Bold and Fun
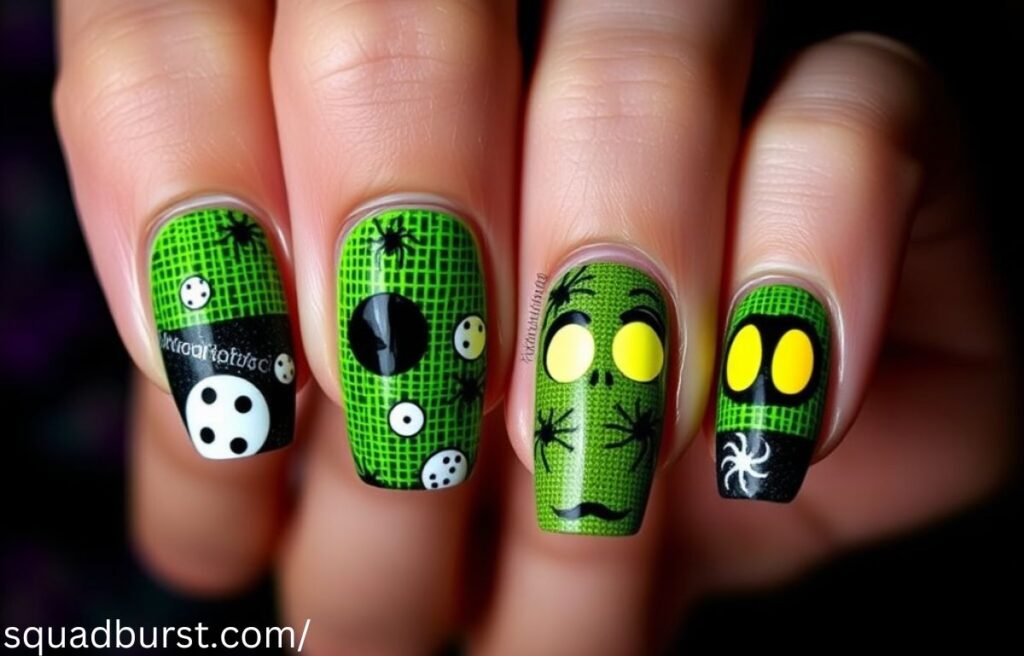
If you’re feeling daring, Oogie Boogie’s mischievous persona is a great way to add some fun to your Halloween nails. With his bold green color and fun texture, Oogie Boogie is an exciting design choice.
Key Design Tips:
- Designs: Use acrylic nails to create long, dramatic nails featuring Oogie Boogie’s face or silhouette.
- Colors: Opt for a green and black color scheme to capture Oogie Boogie’s spirit.
- Finish: Add a glittery purple nails topcoat for an added sparkly effect.
Pro Tip: Play around with sharp Halloween nail designs to give Oogie Boogie a sharp, edgy look.
6. Haunting French Tips with a Twist of Nightmare
For a more elegant and sophisticated take on Halloween nails, French tips Halloween nails are a fantastic choice. However, we’re adding a spooky twist by using black and white polish for the tips, paired with eerie designs.
Key Design Tips:
- Designs: Traditional French tips using black or white for the tip color. Add Jack Skellington’s face or Sally’s patchwork near the cuticle for extra flair.
- Finish: A clear varnish nails finish makes the design crisp and sleek.
Pro Tip: You can even mix short square nails with this design for a chic yet spooky Halloween look.
7. Sharp “Nightmare Before Christmas” Nail Designs for Edgy Looks
If you love edgy, dramatic nail designs, sharp stiletto nails are the way to go. Channel the spooky, sharp angles of Nightmare Before Christmas with this bold shape and bold designs.
Key Design Tips:
- Designs: Incorporate Jack Skellington‘s face, Sally‘s patchwork, or even the iconic Halloween Town scene on each nail.
- Colors: Use black and white nails to create a classic yet dramatic contrast.
- Finish: Consider adding matte top coat nails to give the design an edgy and sophisticated appearance.
Pro Tip: Stiletto nails give ample space for intricate designs, allowing you to get creative with spooky elements.
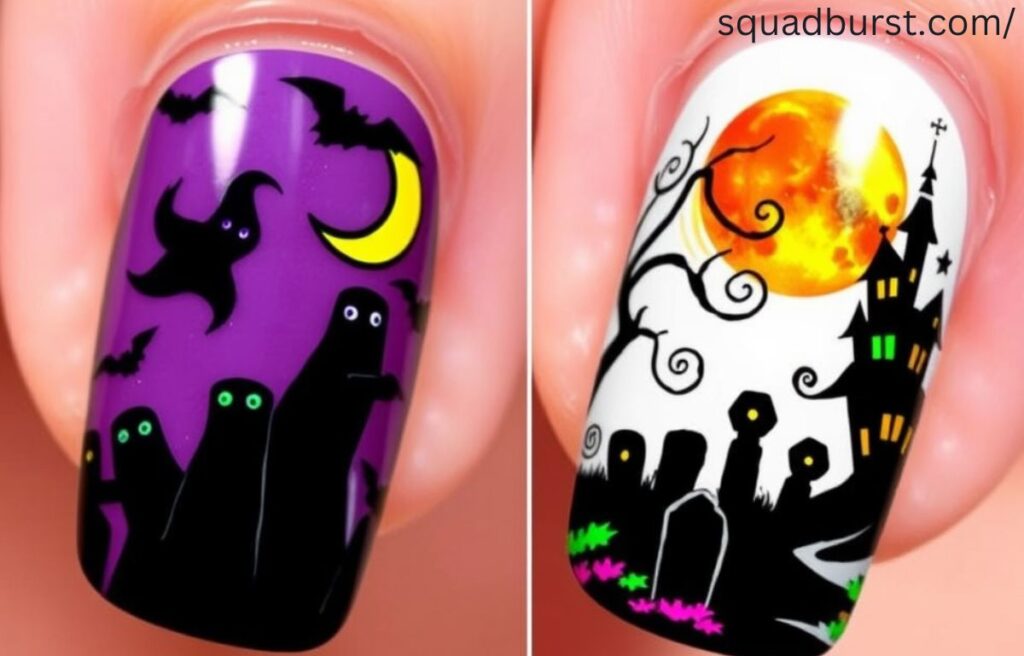
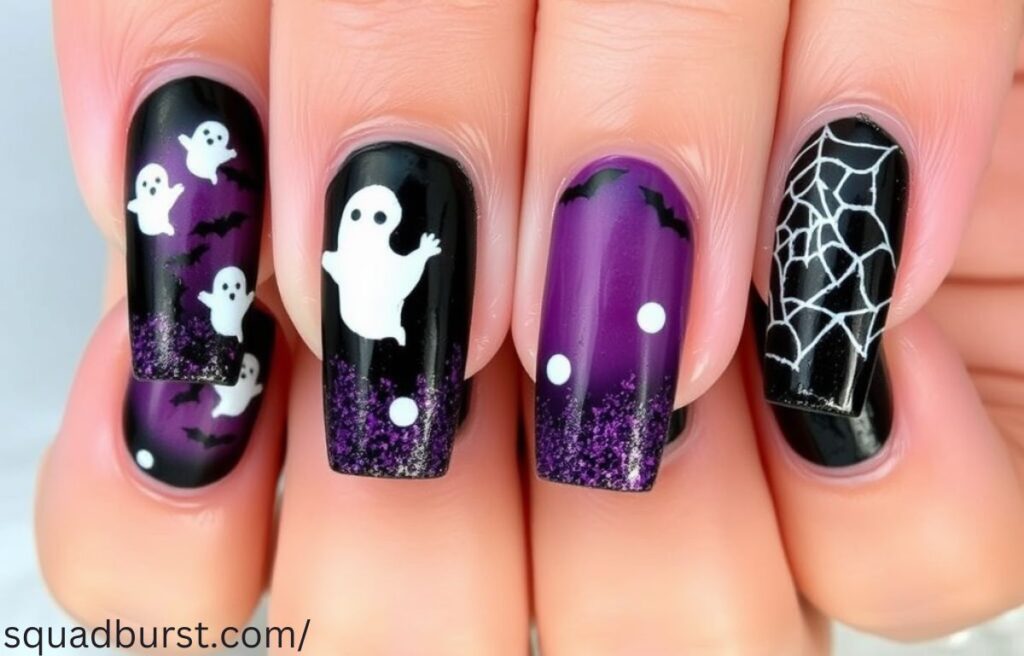
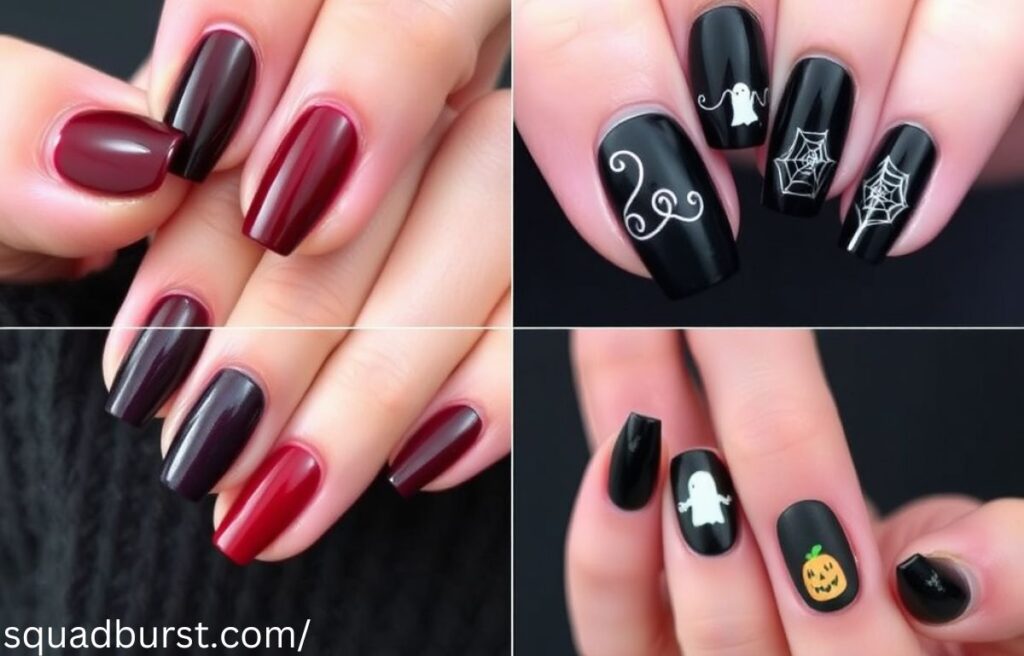
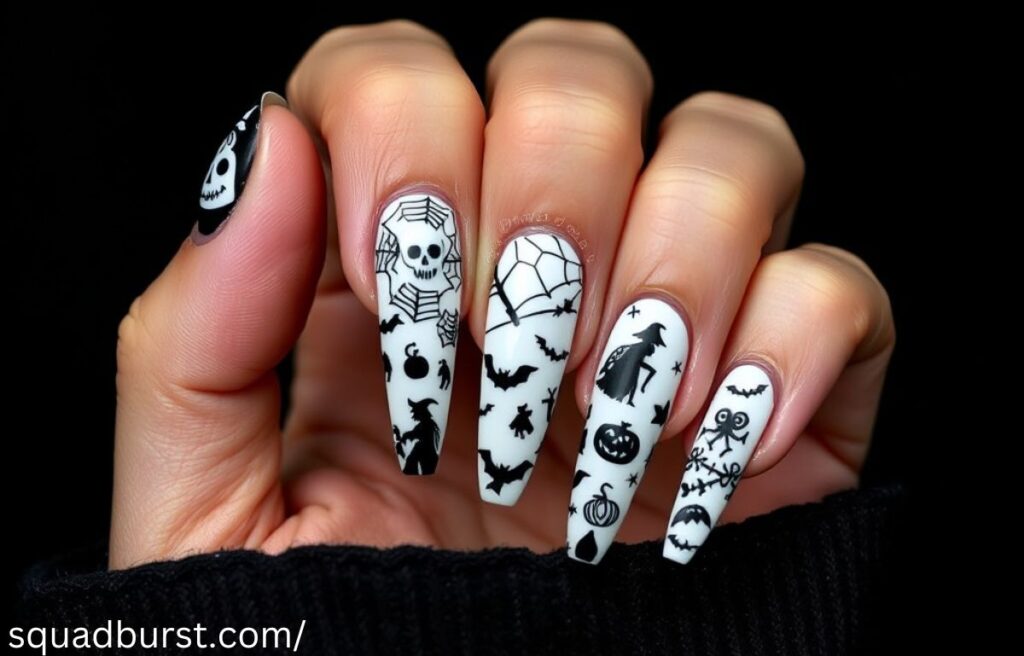
8. Black and White Gothic Elegance for Halloween Party Nails
If you’re aiming for a more gothic style, black and white Halloween nails are an excellent choice. This combination offers a sleek and timeless look, perfect for Halloween or any dark-themed event.
Key Design Tips:
- Designs: Use black for the base and white for accent designs, such as spider webs, bats, or skulls.
- Base: A skin tone base coat can provide a neutral canvas for the bold black and white designs.
- Finish: Add a clear varnish nails finish for a polished look.
Pro Tip: Add a pop of color nails with a tiny splash of glittery purple nails or red to liven up the design without overwhelming it.
9. Detailed “Nightmare Before Christmas” Art for Nail Enthusiasts
For true nail art aficionados, detailed artistic Halloween Town nails are the ultimate expression of creativity. These intricate designs allow you to showcase all your favorite characters and scenes from The Nightmare Before Christmas.
Key Design Tips:
- Designs: Paint Jack’s face, Sally’s patchwork, Zero the ghost dog, and other key scenes from Halloween Town on each nail.
- Shape: Coffin nails are perfect for showing off large, detailed designs.
- Finish: Use acrylic nails for a more dramatic, long-lasting effect.
Pro Tip: Be patient with the details; the more intricate the design, the more impressive your Nightmare Before Christmas nail designs will look.
10. Glowing Jack Skellington Nails: Add Sparkle to Your Spooky Vibe
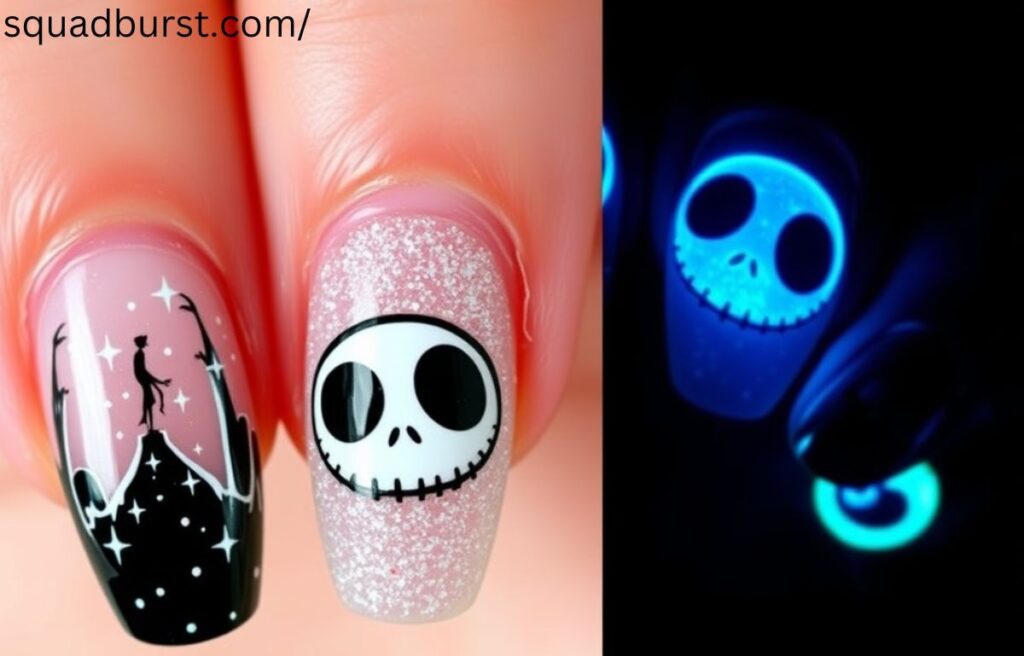
What’s better than Jack Skellington’s face on your nails? Jack Skellington with a touch of glow! These glow-in-the-dark nails are perfect for making a statement at night.
Key Design Tips:
- Designs: Use black and white nails as a base, then add Jack’s face in glow-in-the-dark polish.
- Base: Artificial nails provide the perfect canvas for this design, ensuring the glow effect lasts longer.
Pro Tip: For extra spookiness, use matte top coat nails for the black base and glow in the dark for the accents.
11. Spooky Short Nail Designs for a More Subtle Look
For those who prefer a more subtle Halloween look, cute natural nails with simple designs are perfect. These designs embrace the Halloween spirit without being too over-the-top.
Key Design Tips:
- Designs: Go for short square nails or short almond nails with small Jack Skellington faces, spider webs, or tiny pumpkins.
- Colors: Monochrome nails are ideal for a minimalistic design.
Pro Tip: Add a few Halloween nail polish colors such as deep oranges, reds, or purples for a more festive vibe.
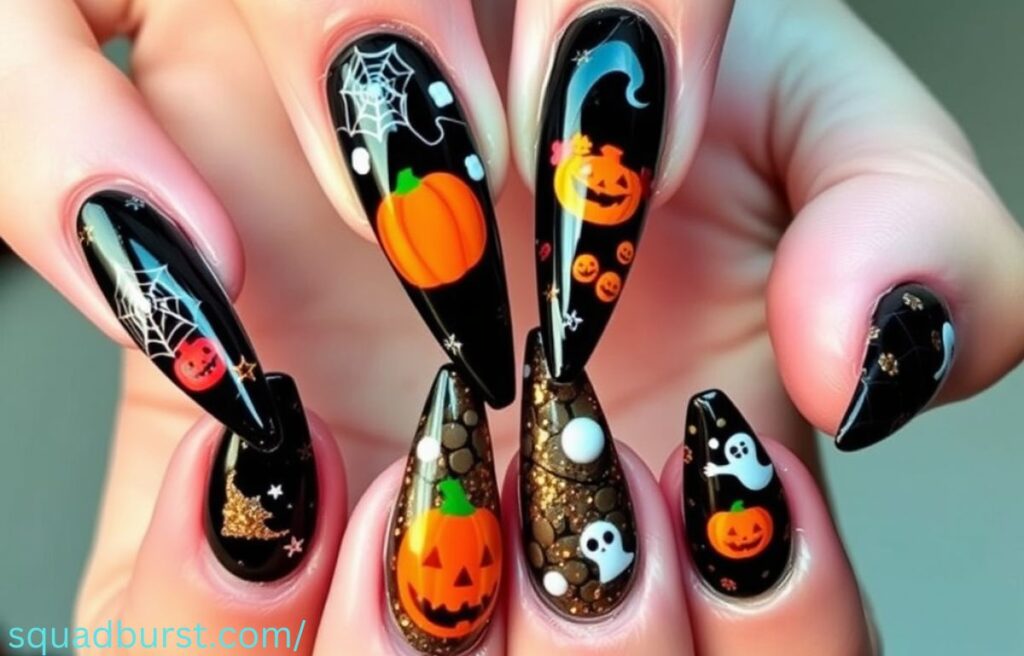
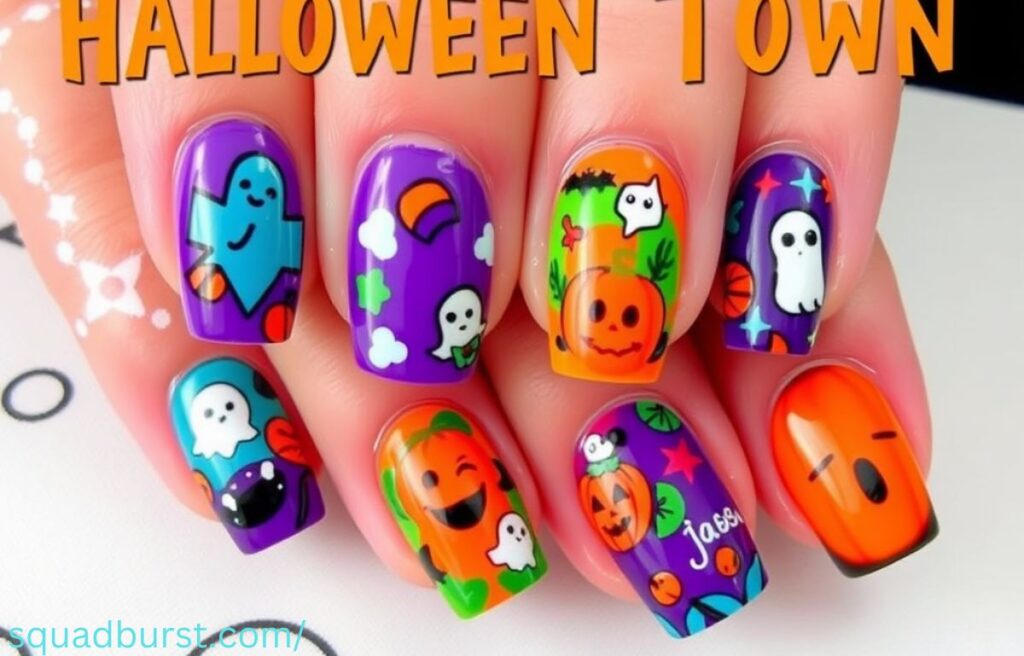
12. Colorful Halloween Nail Art with “Nightmare Before Christmas” Motifs
If you’re all about color, bring the vibrancy of Halloween Town to life with colorful Halloween nails that are both festive and fun.
Key Design Tips:
- Designs: Use acrylic nails to paint Sally’s patchwork in vibrant shades of purple, green, and blue, or create Jack’s face with bold pops of color.
- Colors: Incorporate a wide range of Halloween nail polish colors, including deep purples, reds, and oranges.
- Finish: Use a clear varnish nails finish to maintain a sleek and shiny appearance.
Pro Tip: Don’t forget to add a pop of color nails like bright green or neon pink to make your design even more eye-catching.
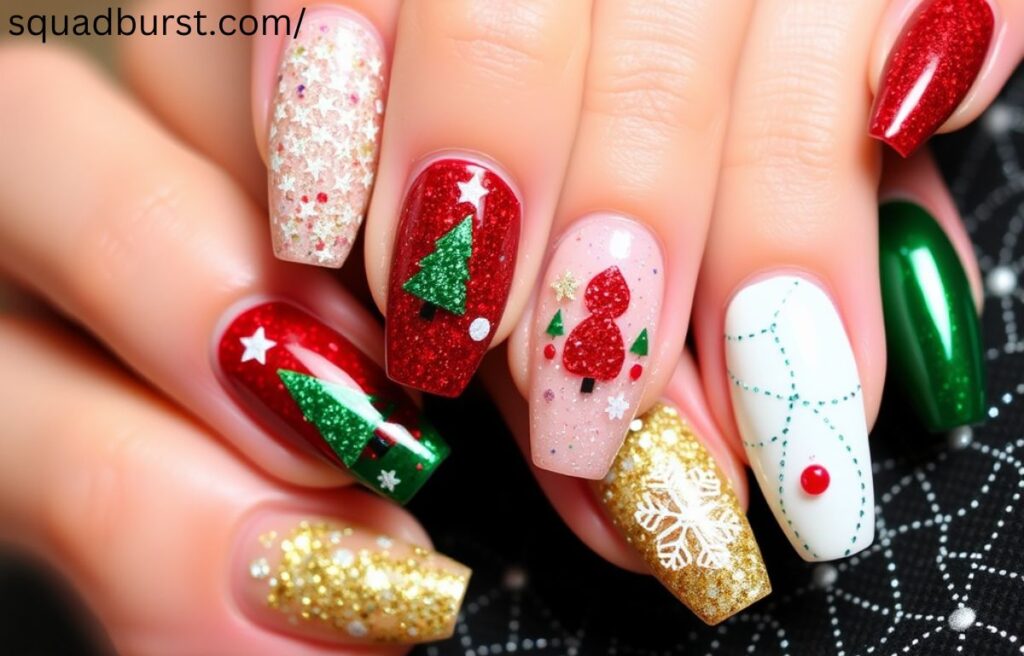
13. The Ultimate Halloween and Christmas Fusion Nails
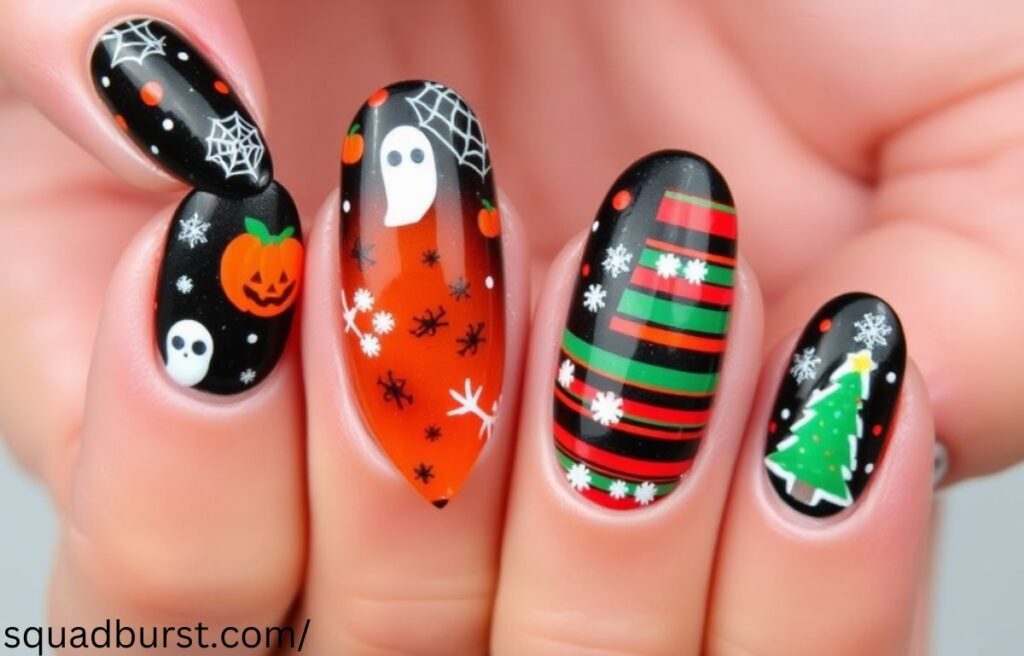
Why not celebrate both holidays at once? Combine the spooky vibes of Halloween and the festive joy of Christmas to create an epic Halloween and Christmas nails design.
Key Design Tips:
- Designs: Combine Halloween pumpkins with Christmas trees or Jack Skellington dressed as Santa.
- Colors: Opt for red, green, and black as your main colors.
- Finish: A glittery purple nails finish will add sparkle to your holiday fusion look.
14. Spooky Glitter: Adding Some Sparkle to Your Nightmare Nails
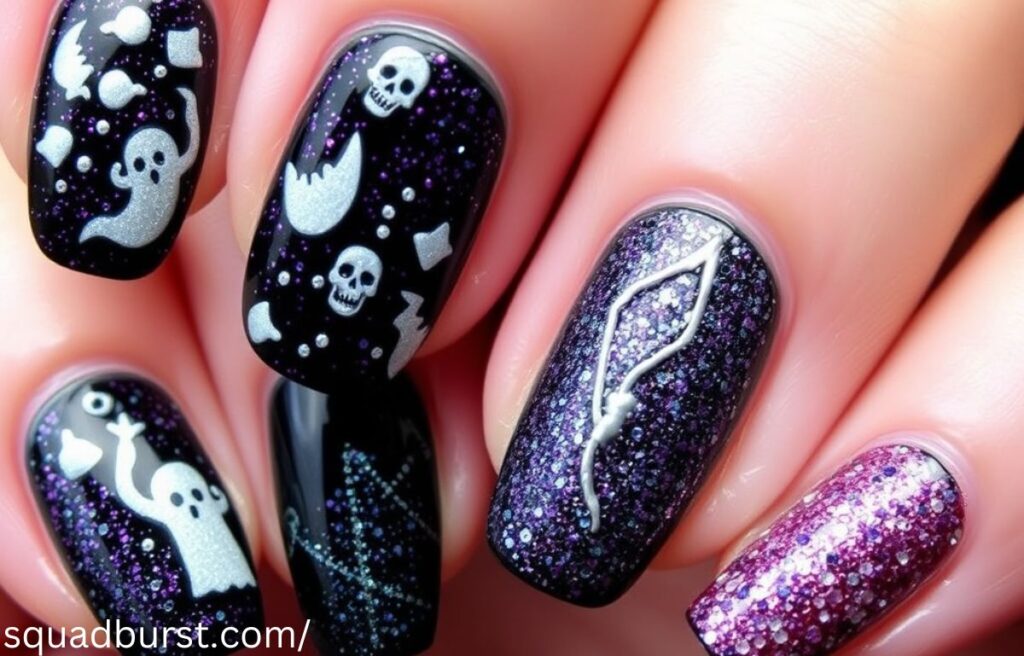
Everyone loves a bit of sparkle, and glittery purple nails are perfect for adding a festive touch to your Nightmare Before Christmas nail designs. Whether you’re creating Jack’s spooky face or a graveyard scene, a little glitter can elevate the design.
Key Design Tips:
- Designs: Add a pop of glitter over a monochrome nail base or use it as an accent for a more dramatic look.
- Shape: Coffin nails work well with glitter accents to create a chic and spooky appearance.
15. Holiday-Inspired Coffin Nails for Ultimate Drama
When you’re aiming for bold and dramatic nails, coffin nails are your go-to design. These long, sharp nails offer ample space for complex, spooky designs from the movie.
Key Design Tips:
- Designs: Create intricate patterns featuring Jack Skellington, Sally, and Oogie Boogie.
- Colors: Use bold colors like black, purple, and orange for a more vibrant look.
- Finish: Try a matte top coat nails finish to keep the look sophisticated.
16. Tiny Nightmare Town Icons on Natural Nails
If you prefer keeping things subtle, yet still want to show off your love for Halloween Town, consider tiny designs on your natural nails.
Key Design Tips:
- Designs: Use a fine brush or nail art decals to paint small icons from Halloween Town, like pumpkins, bats, or the Spiral Hill.
- Colors: Monochrome nails or a natural base with Halloween colors work well.
17. Adding Tim Burton’s Touch to Your Nail Art
Tim Burton’s aesthetic is famous for its quirky, gothic appeal, and his influence is clear in The Nightmare Before Christmas. For Burton fans, adding that signature style to your nails is a must.
Key Design Tips:
- Designs: Use black and white nails with sharp Halloween nail designs, and incorporate elements like crooked trees, moon phases, or iconic Burton-esque elements.
- Shape: Almond nails offer a softer, more whimsical take on Burton’s sharp and eerie designs.
18. Glitter and Glossy Finish: Perfect Combo for Holiday Season Nails
Get festive with a glittery purple nails design mixed with glossy finishes for a Nightmare Before Christmas look that screams holiday season.
Key Design Tips:
- Designs: Add touches of glittery purple nails over a matte top coat nails finish to create a stunning contrast between the textures.
- Base: Use acrylic nails to get long-lasting glittery designs.
19. Adding a Personal Twist to Your Nail Designs
You can always make your Nightmare Before Christmas nail designs truly unique by adding a personal twist. Whether it’s combining your favorite characters, mixing colors, or experimenting with shapes, personalizing your nails gives them an extra touch of magic.
20. Bringing Halloween Town to Life with Acrylic Nails
Acrylic nails are an excellent choice for recreating Nightmare Before Christmas designs, offering ample space to showcase detailed nail art. Whether you opt for long acrylic nails or short square nails, these artificial nails are perfect for intricate and colorful designs.
21. Timeless Classic: Black and White for Every Halloween Occasion
Black and white nails are timeless. Combine these two colors to create dramatic, Halloween-inspired art that will never go out of style.
Key Design Tips:
- Designs: Pair Jack Skellington with Sally’s stitched charm nails or spooky pumpkin designs.
- Finish: Add a matte top coat nails finish for a smooth, elegant look.
22. Quick and Easy Jack Skellington Nail Decals
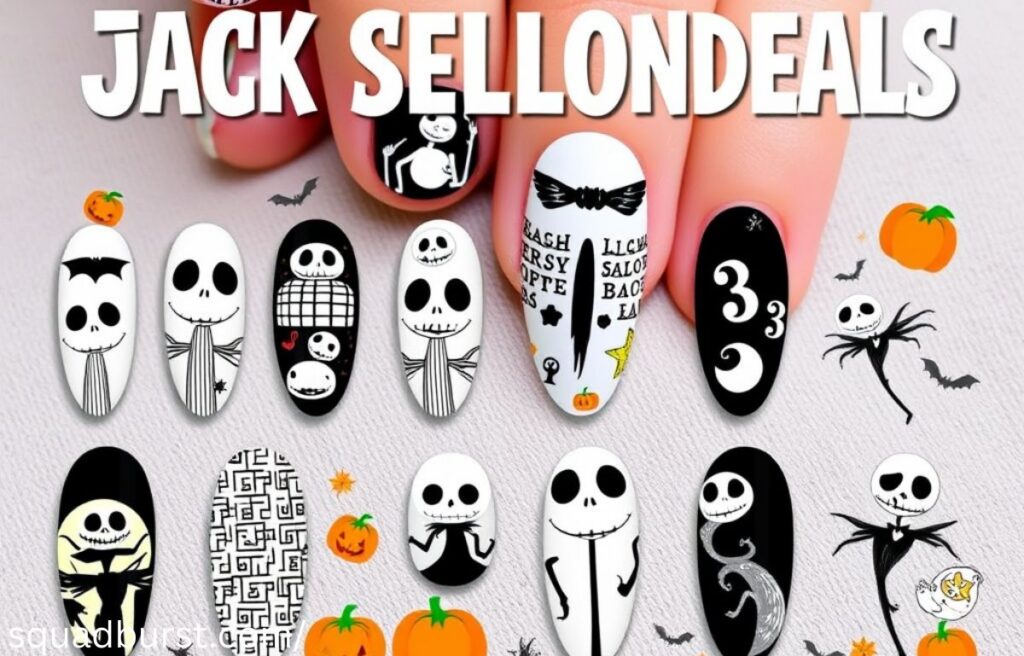
For those who don’t have much time to spend on complex designs, Jack Skellington nail art decals are the perfect solution. They allow you to get intricate designs without the hassle.
Key Design Tips:
- Designs: Apply the decals directly onto your short square nails or short almond nails.
- Finish: Top with a clear varnish nails coat to make the design last.
23. Nail Art for Every Nightmare Before Christmas Fan
Whether you love Jack Skellington, Sally, or Oogie Boogie, there are endless possibilities to showcase your favorite characters in Nightmare Before Christmas nail designs. Get inspired by the iconic imagery of the film, and let your creativity shine this Halloween season!
Sure! Here are 8 more headings to further expand the blog post.
24. Themed Stiletto Nails for Bold Halloween Statements
For those who love making a dramatic statement, stiletto nails are the perfect fit. These nails offer a sleek, sharp look that mimics the eerie, gothic style of The Nightmare Before Christmas.
Key Design Tips:
- Designs: Create Jack Skellington faces or eerie Halloween Town silhouettes on each nail.
- Colors: Use bold Halloween nail polish colors like deep purples, blacks, or silvers to bring out the dramatic effect.
- Finish: Try a glossy clear varnish nails top coat for shine or opt for matte top coat nails for a more understated elegance.
25. Iconic Pumpkin King Nail Designs: Jack Skellington’s Signature Look
Embrace the iconic Pumpkin King himself with detailed Jack Skellington nail designs. His skeletal face is a recognizable symbol of Halloween, and it can easily become the centerpiece of your nails.
Key Design Tips:
- Designs: Go for simple yet striking black and white nails featuring Jack’s face. You can also add a glittery purple nails finish for a touch of whimsy.
- Finish: Apply a matte top coat nails to enhance the gothic feel of the design.
Pro Tip: Use nail art decals for a faster, precise Jack Skellington face on your nails.
26. Vibrant and Fun: Colorful Halloween Town Nails
If you want your nails to be as fun and whimsical as Halloween Town, use vibrant Halloween nail polish colors to reflect the playful energy of the town where all the magic happens.
Key Design Tips:
- Designs: Create Sally’s patchwork or Zero the dog in multiple vibrant colors on your nails.
- Colors: Consider a mix of bold Halloween colors, such as oranges, purples, and reds.
- Finish: Use a glossy top coat to enhance the vibrancy of the design.
27. Sally’s Signature Stitched Nails: Perfect for Ragdoll Fans
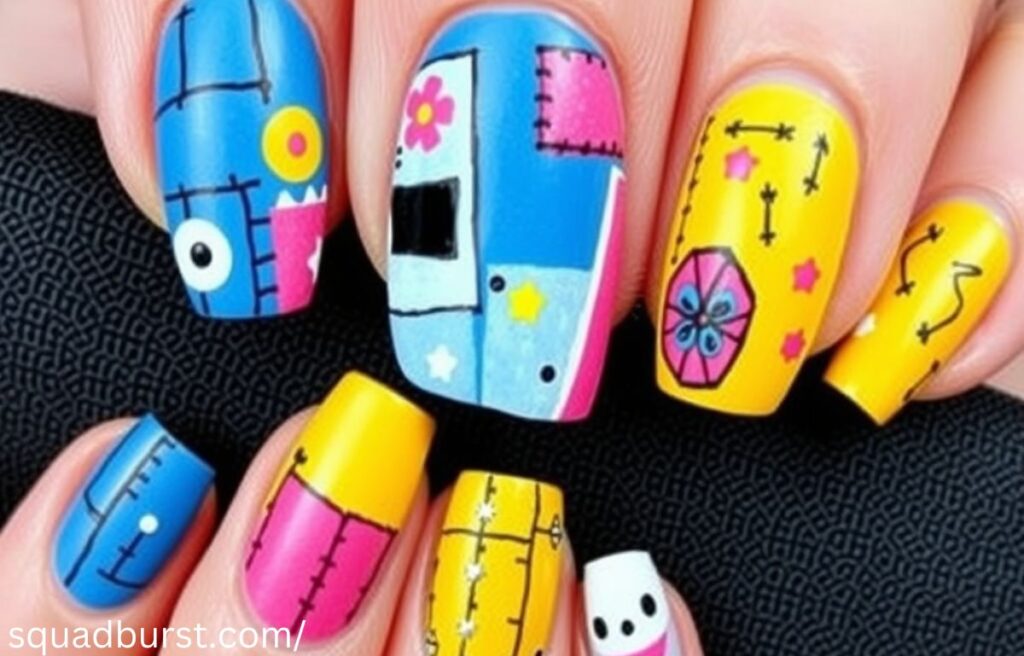
Sally’s stitched charm nails are an adorable and signature look for those who want a softer touch to their Halloween nails. This design captures Sally’s beloved stitched-up look, which translates well into playful yet spooky nail art.
Key Design Tips:
- Designs: Use black and white nails to create Sally’s stitching effect, or use vibrant colors to make the design pop.
- Shape: Almond nails are ideal for this design, as they give a softer, elegant touch to the stitches.
- Finish: Apply a matte top coat nails finish for a vintage feel or go glossy for a modern twist.
28. Spiraling Into Halloween: Artistic Spiral Hill Nail Designs
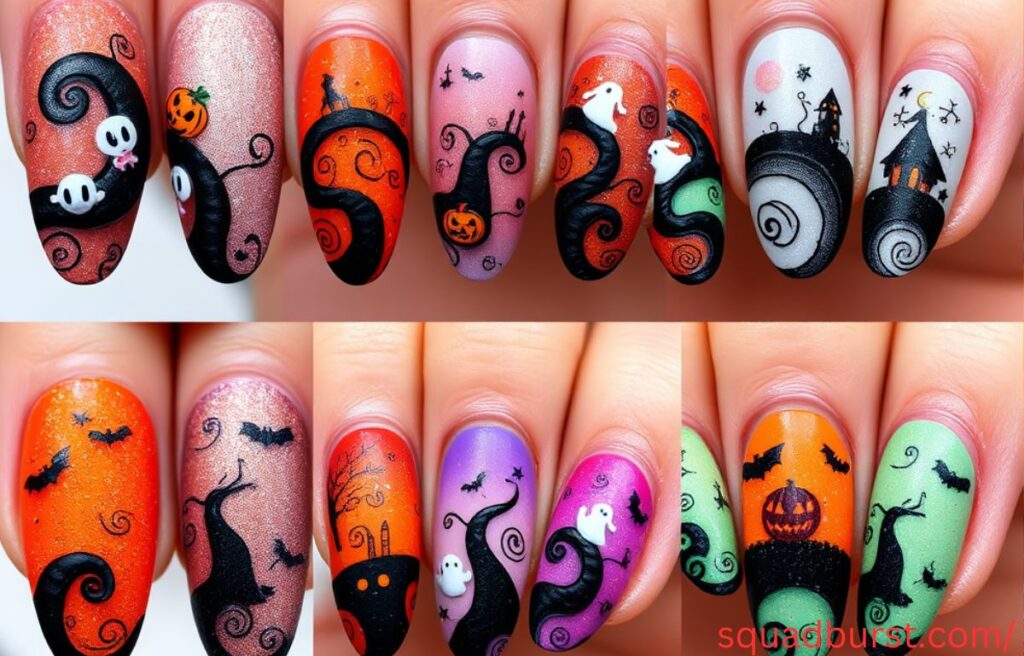
One of the most iconic scenes in The Nightmare Before Christmas is the view of Spiral Hill under the moon. You can create an eerie, dramatic design by incorporating this famous hill into your Halloween nail art.
Key Design Tips:
- Designs: Paint the Spiral Hill on your long acrylic nails or coffin nails for a more dramatic look.
- Colors: A combination of black and white nails with highlights of deep purple or green will create a spooky, atmospheric design.
- Finish: For a magical touch, use a glittery purple nails finish to give your design an extra sparkle.
29. Vibrant Halloween Nail Polish Colors for a Pop of Fun
A simple yet effective way to elevate your Halloween nail art is by choosing vibrant Halloween nail polish colors. Whether it’s an orange for pumpkins or green for spooky vibes, there’s a color for every Halloween enthusiast.
Key Design Tips:
- Designs: Add a pop of color nails with Halloween-inspired symbols like bats, ghosts, and pumpkins.
- Colors: Use bold Halloween nail polish colors like orange, black, purple, and green.
- Finish: Pair with a glittery purple nails finish for some sparkle or opt for a clear varnish nails top coat for a smooth and glossy finish.
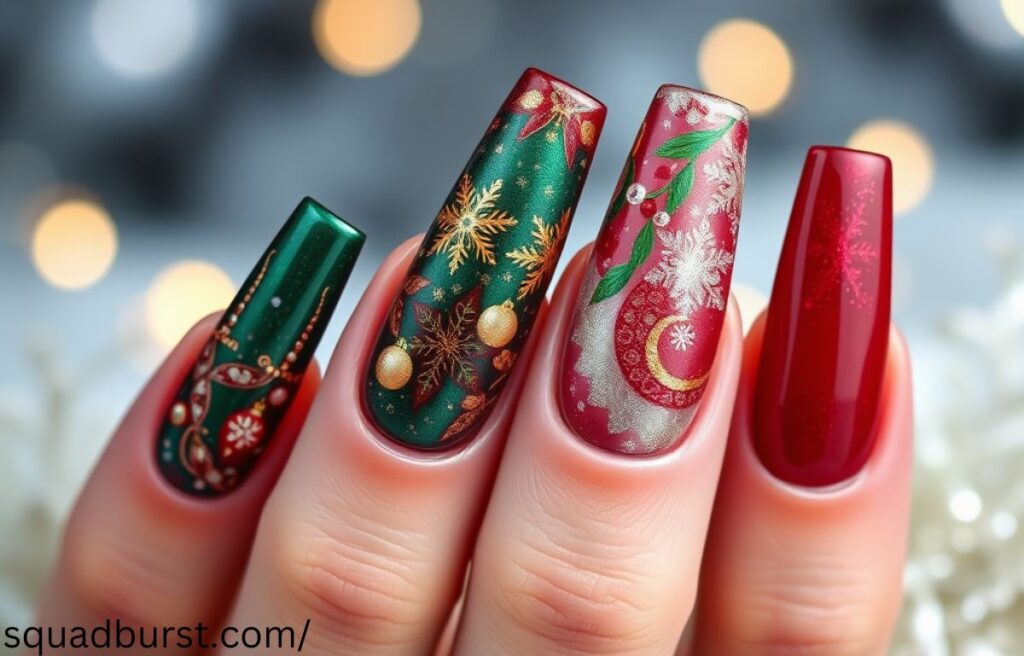
30. Halloween and Christmas Merge: A Dual Holiday Nail Art Style
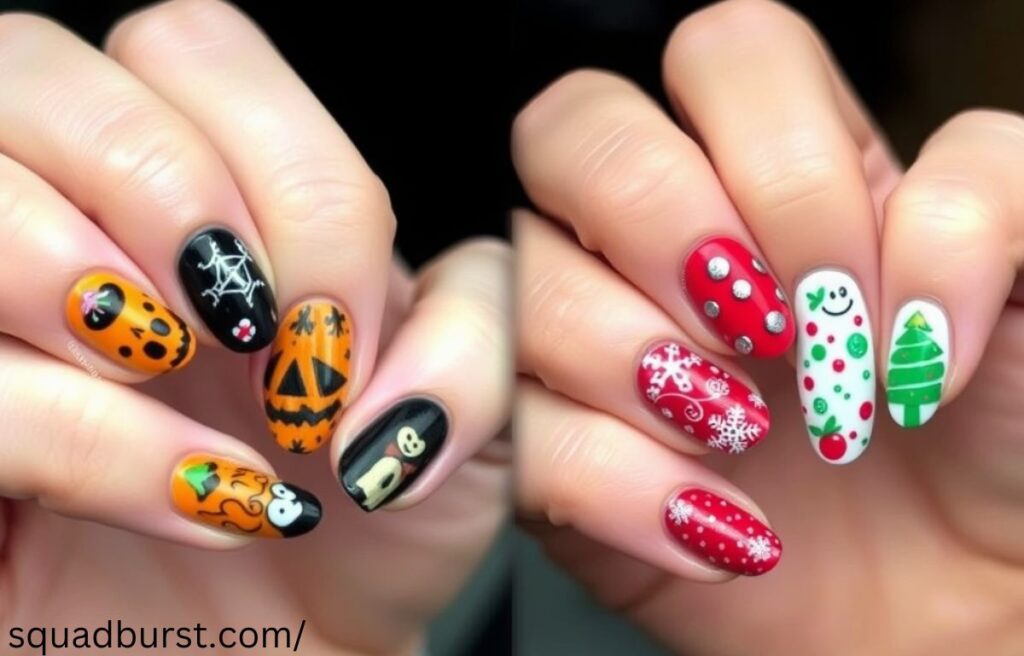
Who says you can’t combine both holidays into one stunning nail design? Blending the spooky with the festive, Halloween and Christmas nails is the perfect way to celebrate both seasons.
Key Design Tips:
- Designs: Paint one set of nails with Halloween Town motifs, and the others with Christmas Town designs, like Jack as Santa or pumpkins with Christmas lights.
- Colors: Mix black and white nails with red, green, and glittery accents.
- Finish: A glossy top coat will make your nails shine for the holiday season.
conclusion
In conclusion, The Nightmare Before Christmas offers endless inspiration for creating fun and spooky nail designs. Whether you choose Jack’s spooky face, Sally’s colorful patchwork, or Oogie Boogie’s creepy dice, there’s a design for everyone. You can experiment with different colors and styles to match your own unique vibe. Apna Keyword Likhy, the possibilities are endless when it comes to combining creativity with your favorite characters.
These nail designs are not only a great way to show your love for the movie but also a fun way to express your style. From simple to intricate, you can easily create something that stands out. So, grab your nail tools and get creative. Apna Keyword Likhy, with these 30 designs, you’ll definitely make a statement wherever you go!
FAQS:
What are “The Nightmare Before Christmas” Nail Designs?
“The Nightmare Before Christmas” nail designs are creative nail art styles inspired by Tim Burton’s iconic movie. These designs often feature characters like Jack Skellington, Sally, and other spooky elements from Halloween Town and Christmas Town. They combine eerie, gothic, and whimsical touches, perfect for Halloween and the holiday season.
Can I create Nightmare Before Christmas nails at home?
Yes, you can! With the right tools like nail art decals, Halloween nail polish colors, and a steady hand, you can create stunning Nightmare Before Christmas designs at home. If you’re new to nail art, you can use simple designs or nail art decals to make the process easier and faster.
What nail shapes work best for “The Nightmare Before Christmas” Nail Designs?
For these spooky designs, coffin nails, stiletto nails, and square nails are great options. They give you enough space to showcase detailed designs such as Jack Skellington’s face or Sally’s stitched nails. If you prefer something more subtle, short almond nails or natural nails work well too.
What are the best Halloween nail polish colors for “The Nightmare Before Christmas” designs?
For a classic Nightmare Before Christmas look, black and white nails are key, as they represent Jack Skellington and other spooky elements. Glittery purple nails and deep orange also work wonderfully for a more festive touch. You can mix these colors to bring the Halloween and Christmas spirit to life on your nails.
How long do The Nightmare Before Christmas nail designs last?
The longevity of your Nightmare Before Christmas nail designs depends on the type of polish and finish you use. If you apply a good quality top coat like a matte top coat nails or glossy finish, your designs should last around 7 to 10 days. Acrylic nails can last even longer with proper care.
Can I use nail art decals for these designs?
Absolutely! Nail art decals are a fantastic way to create detailed Nightmare Before Christmas designs quickly. You can find decals featuring Jack Skellington, Sally, and other beloved characters from Halloween Town. These decals allow you to achieve a flawless design with minimal effort.
How do I maintain my Nightmare Before Christmas nail art?
To keep your Nightmare Before Christmas nail art looking fresh, make sure to apply a top coat regularly to seal in the design and protect it from chips. Avoid using harsh chemicals and moisturize your nails and cuticles to keep them healthy. If using acrylic nails, be mindful of their maintenance to avoid damage.
Are “The Nightmare Before Christmas” Nail Designs suitable for both Halloween and Christmas?
Yes! These designs beautifully blend the spooky and festive sides of both Halloween and Christmas. Jack Skellington’s dual role as the Pumpkin King and Santa Claus makes these nails perfect for transitioning between the two holidays. Whether it’s Halloween or Christmas, these designs will bring holiday cheer to your fingertips.
These FAQs should help answer any questions your readers may have and guide them in creating their perfect “The Nightmare Before Christmas” Nail Designs to Spook and Slay!.

Emma Grace is a creative contributor to Squad Burst, blending her love for fashion and sports into captivating content. Her fresh perspective and relatable voice make her a favorite among readers who share her passion for style and athleticism.