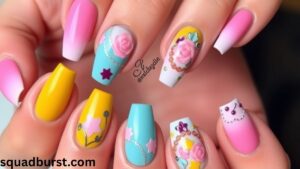
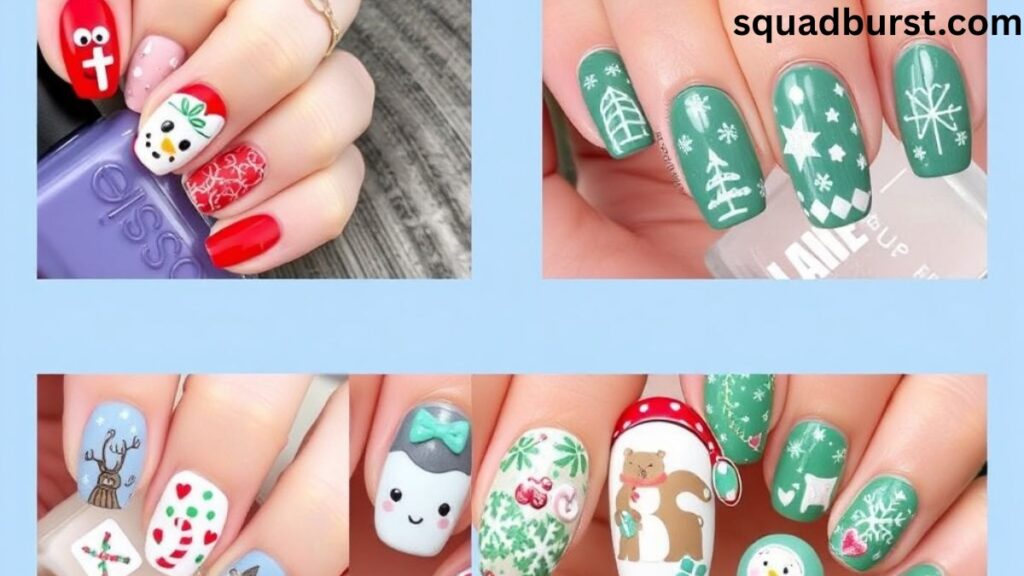
24 Stunning Christmas Nail Ideas to Sleigh the Holiday Season is a festive roundup of charming, joyful, and creative nail designs made to match the sparkle of the holidays. From shimmering snowflakes to candy cane swirls, these 24 Stunning Christmas Nail Ideas to Sleigh the Holiday Season blend classic holiday colors, glitter, and art into perfect fingertip expressions of cheer.
Sparkle through the season with bold, trendy, and magical manicures. These 24 Stunning Christmas Nail Ideas to Sleigh the Holiday Season are not just nail art—they’re holiday statements. Whether you love minimal elegance or full-on festive glam, these 24 Stunning Christmas Nail Ideas to Sleigh the Holiday Season turn every look into something unforgettable.
Add instant holiday charm to your hands with the 24 Stunning Christmas Nail Ideas to Sleigh the Holiday Season. Featuring glossy finishes, cozy themes, and fun winter accents, these 24 Stunning Christmas Nail Ideas to Sleigh the Holiday Season will keep your nails merry, bright, and ready for celebration.
Essential Tools & Prep for Christmas Nail Art
Creating stunning festive nail art starts with the right foundation and tools. Professional results depend more on proper preparation than expensive equipment.
Must-Have Colors for Holiday Nail Designs
Your Christmas color palette should include these essential shades:
| Color Category | Essential Shades | Pro Tip |
|---|---|---|
| Classic Reds | Cherry red, burgundy, crimson | Choose blue-undertoned reds for cooler skin |
| Festive Greens | Forest green, emerald, sage | Emerald works on all skin tones |
| Winter Whites | Pure white, cream, pearl | Pearl white adds sophistication |
| Metallic Accents | Gold, silver, rose gold | Mix with base colors for depth |
| Rich Blues | Navy, royal blue, ice blue | Perfect for blue and white winter nails |
Essential Tools for DIY Christmas Nail Art
Professional-looking Christmas nail art requires specific tools:
Basic Kit:
- Fine detail brushes (sizes 0, 2, 4)
- Dotting tools in various sizes
- Striping tape for clean lines
- Small makeup sponges for gradients
- Toothpicks for fine details
- Nail stamping plates with holiday designs
- Small scissors for precise tape cutting
- Tweezers for rhinestone placement
- UV lamp for gel polish curing
Nail Prep Secrets for Long-Lasting Results
Proper preparation makes your holiday nail trends last through New Year’s Eve:
- Push back cuticles gently – never cut them
- Buff nail surface lightly for better adhesion
- Clean nails with rubbing alcohol to remove oils
- Apply thin base coat layers – two thin coats beat one thick layer
- Wait 2 minutes between coats for proper curing
Classic Christmas Elegance
These timeless Christmas nail designs never go out of style. They’re perfect for traditional holiday celebrations and complement any festive outfit.
Candy Cane Stripes That Actually Stay Put
The candy cane nail design requires precision, but these techniques guarantee clean lines every time.
Start with two coats of white base polish. Once completely dry, apply thin striping tape diagonally across each nail. The key is using high-quality striping tape that won’t leave residue.
Paint over the tape with red polish, applying thin coats to prevent bleeding. Remove tape immediately while polish is still wet – waiting too long creates jagged edges.
Pro Secret: Apply a thin layer of clear top coat over the white base before taping. This creates a barrier that prevents red polish from seeping under the tape.
Color variations beyond traditional red and white create modern twists:
- Rose gold and cream for subtle elegance
- Navy and silver for sophisticated appeal
- Green and white for fresh winter vibes
Holly Berry Magic with Dimensional Dots
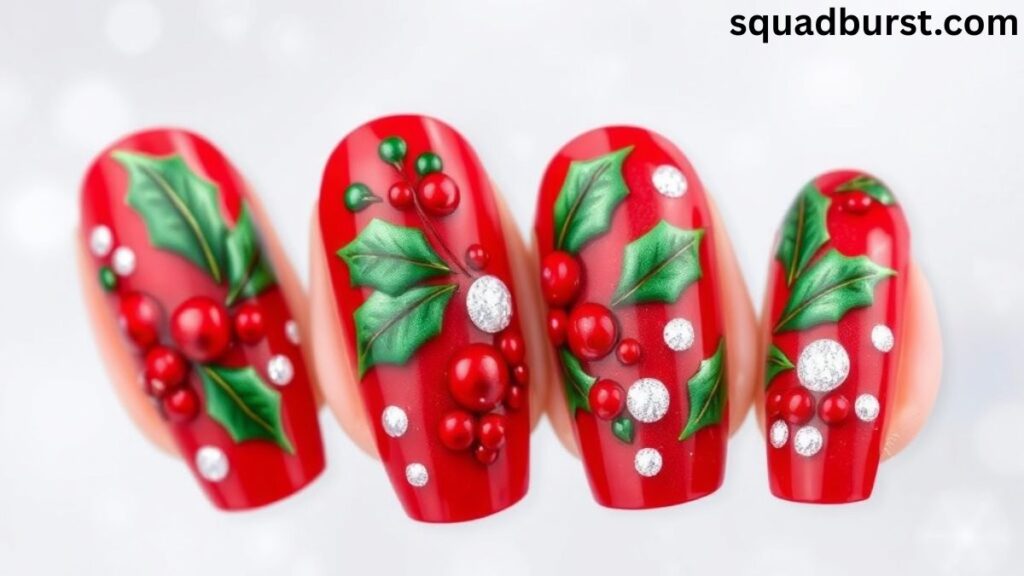
Holly berry nail accents bring nature’s beauty to your fingertips. This design works beautifully as an accent nail or across all fingers.
Create realistic holly leaves using a flat brush loaded with forest green polish. Paint elongated oval shapes with pointed ends, then add the characteristic spiky edges with a detail brush.
For dimensional berries, use a large dotting tool with red polish. Create clusters of 3-5 dots in varying sizes. While still wet, add tiny white dots with a toothpick for shine highlights.
Advanced Technique: Mix your red polish with a drop of clear polish containing microglitter. This creates natural-looking berry shimmer without overwhelming sparkle.
Santa Hat French Tips
Transform the classic French manicure into festive fingertips with this playful Santa hat variation.
Apply your base color – nude, pink, or clear work beautifully. Instead of white tips, paint diagonal red sections across the nail tips to mimic Santa’s hat shape.
Add white “fur” details using a small brush with fluffy, uneven strokes along the red edge. Complete each hat with a tiny white pom-pom dot at the tip corner.
Style Variations:
- Glitter Santa hats – mix fine red glitter into your red polish
- Ombre Santa hats – blend red into pink for subtle gradients
- Mini Santa hats – create smaller versions on shorter nails
Elegant Evergreen Branches
Perfect for winter nail trends, evergreen designs bring forest magic to your manicure.
Using a dark green base, create branch structures with a fine brush and brown polish. Paint thin, slightly curved lines extending from nail corners.
Add pine needles with quick, feathery strokes using a detail brush. Layer different green shades – forest green, sage, and olive – for realistic depth.
Finish with tiny gold or silver dots representing dewdrops or ornaments. Space them irregularly for natural appeal.
Whimsical & Fun Holiday Designs
These playful Christmas nail art ideas celebrate the joy and magic of childhood Christmas memories. They’re conversation starters that spread holiday cheer wherever you go.
Reindeer Silhouettes Done Right
Reindeer nail art captures holiday whimsy without looking childish. The secret lies in elegant execution and color choices.
Start with a gradient background using sponge-dabbing technique. Blend deep purple into black for a twilight sky effect, or create snowy nail designs with white-to-blue gradients.
For reindeer silhouettes, cut stencils from contact paper or use pre-made nail stencils. Apply black polish over the stencil for crisp edges. Remove immediately while wet.
Rudolph Variation: Add a tiny red dot for his glowing nose using a dotting tool. Position it precisely where the reindeer’s snout would be.
Sophisticated Approach: Use metallic bronze or gold instead of black for the silhouettes. This creates luxury appeal while maintaining the whimsical theme.
Gingerbread Cookie Cuteness
Gingerbread man nail art requires texture techniques that make your nails look good enough to eat.
Create the cookie base using brown polish mixed with a drop of orange for authentic gingerbread color. Apply this in slightly uneven strokes to mimic baked texture.
For royal icing details, use white polish with a fine brush to add:
- Simple face features (dots for eyes, curved smile)
- Clothing outlines (vest, buttons, bow tie)
- Decorative borders around arms and legs
Texture Secret: While the brown base is slightly tacky, lightly press a clean makeup sponge over the surface. This creates subtle texture resembling real cookie surfaces.
Scented Addition: Some nail artists add a drop of cinnamon essential oil to clear top coat for subtle holiday fragrance. Test on one nail first to ensure no skin sensitivity.
Present Box Perfection
Transform your nails into tiny gift-wrap inspired nails with these geometric ribbon techniques.
Choose your wrapping paper colors – classic combinations include:
- Red base with gold ribbon
- Green base with silver ribbon
- White base with red ribbon
- Blue base with silver ribbon
Apply base color in two thin coats. Once dry, use striping tape to create ribbon patterns. For wrapped box effects, place tape in cross patterns across the nail.
Paint over tape with metallic polish, remove immediately, then add bow details at the intersection points using a small brush.
3D Bow Technique: Create dimensional bows using thick clear polish mixed with bow-colored polish. Build up layers for realistic ribbon loops.
Snowman Faces That Won’t Smudge
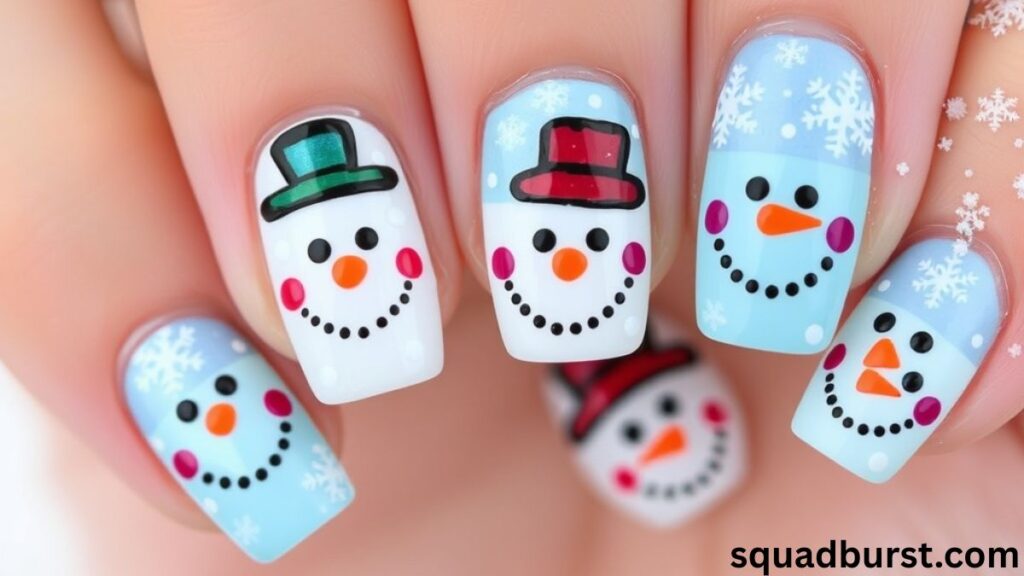
Creating adorable winter-themed nail art with snowman faces requires proportion secrets and lasting techniques.
Use white or pale blue base polish for the snowman’s body. The key is getting facial proportions right on tiny nail canvases.
Proportion Guidelines:
- Eyes should be 1/4 from nail top
- Space eyes 1/3 nail width apart
- Place carrot nose slightly below eye level
- Position mouth 1/4 from nail bottom
For lasting details, use gel polish or regular polish sealed with thick top coat. Apply features with dotting tools and fine brushes, allowing each element to dry completely before adding the next.
Winter Accessory Additions:
- Tiny top hats using black polish
- Colorful scarves with striped patterns
- Stick arms extending beyond nail edges
- Coal buttons down the center
Glamorous Holiday Sophistication
These luxurious Christmas nail designs perfect for elegant holiday parties and sophisticated celebrations. They combine festive themes with high-fashion appeal.
Frosted Snowflake Artistry
Frosted snowflake nails capture winter’s crystalline beauty with techniques that create genuine frost effects.
Start with an ombre frost effect base. Sponge white polish over clear base, concentrating at nail tips and fading toward cuticles. This mimics natural frost patterns.
Hand-Painted Snowflakes vs. Stamping:
| Technique | Pros | Cons | Best For |
|---|---|---|---|
| Hand-painted | Unique designs, custom sizes | Time-intensive, requires skill | Accent nails, special occasions |
| Stamping | Quick, consistent results | Limited design options | Full manicures, beginners |
| Stencils | Clean edges, reusable | Less detailed than hand-painting | Medium complexity designs |
For hand-painted snowflakes, use a fine brush with white or silver polish. Start with a cross shape, then add diagonal lines and decorative endpoints.
Crystal Accent Placement: Add tiny rhinestones at snowflake centers or endpoints. Use tweezers for precise placement and seal with thick top coat.
Metallic Foil Magic
Metallic foil red nails create mirror-like finishes that catch every light. Professional application techniques ensure smooth, chip-resistant results.
Foil Application Methods:
Transfer Foil Technique:
- Apply black or dark base polish
- While slightly tacky, press foil sheet firmly
- Peel away quickly for seamless transfer
- Seal with gentle top coat application
Gel Foil Method:
- Apply gel base coat, cure under UV
- Apply thin foil adhesive, cure again
- Press foil, remove backing
- Seal with gel top coat
Repair Methods for Chips: Keep extra foil pieces for quick touch-ups. Apply small pieces over chips, blend edges, and seal.
Color Combinations That Pop:
- Red foil over black base – classic luxury
- Gold foil over burgundy – rich elegance
- Silver foil over navy – modern sophistication
Emerald and Gold Luxury
Emerald green nails with gold accents epitomize holiday luxury. These jewel-toned designs require color theory knowledge for perfect balance.
- Use two thin coats rather than one thick layer
- Add one drop of black polish to deepen color
- Apply over white base for true color intensity
Marble Effect Techniques: Create sophisticated marble patterns by dropping gold polish into wet emerald base. Use a toothpick to swirl gently – less is more for elegant results.
Balancing Bold Colors:
- Use emerald on 3 nails, gold accent on 2
- Create gradient effects blending emerald to gold
- Add gold details (stripes, dots) over emerald base
Rose Gold Winter Wonderland
Rose gold brings warmth to winter nail designs while maintaining sophisticated appeal.
Gradient Techniques: Start with white base at cuticles, blend into rose gold at tips using makeup sponges. Build color gradually with multiple light layers.
Glitter Placement Strategies:
- Concentrated glitter at tips for ombre effect
- Scattered placement for starry night appearance
- Gradient application from heavy to light
Complementary Color Pairings:
- Rose gold + cream white = soft elegance
- Rose gold + deep plum = rich sophistication
- Rose gold + sage green = modern botanical
Show-Stopping Statement Nails
These dramatic Christmas nail art designs make bold statements perfect for special occasions and holiday parties where you want to dazzle.
3D Christmas Tree Masterpiece
Creating dimensional 3D Christmas nail designs requires building techniques that maintain structural integrity.
Foundation Building: Start with dark green base polish. Use a small brush to paint triangular tree shapes, making each layer slightly smaller than the one below.
Building Dimension Safely:
- Apply thin layers of green polish, allowing each to dry completely
- Build height gradually – rushed application creates weak structures
- Use gel polish for stronger dimensional elements
Ornament Detail Techniques: Add tiny ornament dots using bright colors – red, gold, silver. Apply with dotting tools in varying sizes to create depth illusion.
Tree Topper Ideas:
- Gold star using metallic polish
- Tiny rhinestone for sparkle
- White pearl dot for elegance
Structural Integrity Tips:
- Keep dimensional elements under 2mm height
- Seal with multiple thin top coat layers
- Avoid thick top coat that can cause sagging
Winter Galaxy with Aurora Effects
Winter wonderland meets cosmic beauty in these ethereal designs that capture northern lights magic.
Blending Techniques for Space Looks: Create dark space backgrounds using black polish. While wet, dab small amounts of deep purple, navy, and forest green using makeup sponges.
Aurora Color Combinations:
- Green + blue + purple for classic northern lights
- Pink + purple + blue for magical sunset auroras
- Teal + mint + white for icy winter auroras
Shimmer Application Methods: Layer iridescent top coats over the base colors. Apply in thin layers, allowing each to dry completely. The key is building luminosity gradually.
Star Addition Techniques: Use white polish with fine brush to add tiny stars. Vary sizes and spacing for realistic night sky effects. Add larger stars with small dots of silver polish.
Plaid Perfection
Red and white nail designs get sophisticated treatment with precise plaid patterns that rival designer fabrics.
Grid Technique Mastery: Create perfect plaid using striping tape for guidelines. Apply base color, then use tape to create grid patterns before adding contrasting colors.
Traditional vs. Modern Color Schemes:
| Style | Color Palette | Occasion | Difficulty |
|---|---|---|---|
| Traditional | Red, green, gold | Family gatherings | Beginner |
| Modern | Navy, silver, white | Office parties | Intermediate |
| Luxury | Burgundy, gold, cream | Elegant events | Advanced |
| Playful | Pink, purple, white | Casual celebrations | Beginner |
Tools for Precise Lines:
- High-quality striping tape that removes cleanly
- Fine detail brushes for touch-ups
- Steady hand techniques (rest on table surface)
- Good lighting for precision work
Vintage Christmas Cameo Style
Nostalgic holiday nails celebrate old-fashioned Christmas charm with intricate miniature painting techniques.
Antique-Inspired Color Palettes:
- Dusty rose, sage green, cream
- Burgundy, gold, ivory
- Deep teal, copper, pearl
Detailed Miniature Painting: Create vintage cameo effects using contrasting colors. Paint oval shapes, then add silhouette profiles or holiday motifs like wreaths, bells, or vintage ornaments.
Protective Application: Vintage designs require extra protection due to detailed work:
- Apply base coat, let dry completely
- Create design elements, dry between colors
- Apply thin first top coat layer
- Add second top coat for durability
- Consider gel top coat for extended wear
Making Your Holiday Manicure Last
Professional longevity secrets ensure your seasonal nail inspiration survives holiday festivities, gift wrapping marathons, and winter weather challenges.
Prep Secrets Professionals Use
Cuticle Care Foundation: Push back cuticles gently using a rubber cuticle pusher after warm water soaking. Never cut cuticles – this creates infection risks and uneven polish lines.
Surface Preparation: Lightly buff nail surfaces with a 240-grit file to create optimal polish adhesion. Remove all dust with a clean, lint-free cloth dampened with rubbing alcohol.
Base Coat Science: Apply base coat in thin layers, sealing nail plate edges. This prevents staining and provides smooth foundation for color application.
Daily Maintenance Tips
Protective Habits:
- Wear gloves while cleaning, cooking, or doing yard work
- Apply cuticle oil daily to prevent cracking
- Avoid using nails as tools (opening packages, scratching)
- Reapply top coat every 3-4 days for shine renewal
Hydration Techniques: Winter air strips moisture from nails and surrounding skin. Combat dryness with:
- Hand cream application 3-4 times daily
- Overnight cuticle treatments using vitamin E oil
- Humidifier use in bedrooms during dry winter months
Quick Fix Techniques for Holiday Emergencies
Chip Repair Method:
- Clean the chipped area with rubbing alcohol
- Apply thin layer of matching polish
- Blend edges with small brush
- Seal with top coat once dry
Smudge Recovery: For wet polish smudges, lick your finger and gently smooth the damaged area. The enzymes in saliva help level the polish surface.
Emergency Polish Removal: When one nail needs complete redo, use cotton swab dipped in acetone for precise removal without affecting surrounding nails.
Nail Care During the Holiday Rush
Winter weather and holiday stress take tolls on nail health. Proactive care prevents damage and maintains beautiful manicures longer.
Protecting Nails from Winter Damage
Environmental Challenges:
- Cold air reduces nail flexibility, increasing breakage risk
- Indoor heating strips natural oils from nail plates
- Frequent hand washing removes protective barriers
- Holiday stress can trigger nail biting habits
Protection Strategies: Invest in quality hand creams containing ceramides and hyaluronic acid. Apply before bed and after hand washing for optimal absorption.
Cuticle Oil Benefits: Daily cuticle oil application prevents painful hangnails and maintains healthy nail growth. Massage oil into cuticles and surrounding skin for best results.
Recovery Methods After Elaborate Designs
Gentle Removal Process: Soak cotton balls in acetone-free remover, place on nails, wrap fingertips in foil. Wait 10 minutes before gently pushing off polish. This prevents excessive scrubbing damage.
Nail Strengthening Treatments: After removing elaborate designs, give nails recovery time with strengthening treatments containing calcium and protein.
Healthy Growth Promotion: Massage hands and cuticles daily to stimulate blood circulation. Good circulation promotes faster, stronger nail growth
conclusion
The holidays are the perfect time to show off your style with fun and festive nails. Whether you love classic red and green, shiny gold, or cute candy cane designs, there’s something magical for everyone. 24 Stunning Christmas Nail Ideas to Sleigh the Holiday Season offers the best ways to bring holiday cheer to your fingertips. These creative looks help you feel ready for parties, gifts, and cozy nights by the fire.
From snowflakes to Santa hats, your nails can truly shine this season. Pick a design that matches your mood or outfit, and let your hands do the talking. 24 Stunning Christmas Nail Ideas to Sleigh the Holiday Season gives you endless ideas to stand out and feel festive. So book your nail appointment now and let your nails sleigh all winter long!
FAQs
1. What are the trending Christmas nail colors for 2025?
Red, emerald green, gold, icy blue, and glittery silver are the top trending Christmas nail colors in 2025.
2. How long do Christmas nail designs usually last?
With gel polish or acrylics, festive nail designs can last 2 to 3 weeks without chipping.
3. Can I get Christmas nail art on natural nails?
Yes, many salons offer festive designs on natural nails using regular or gel polish.
4. Are 3D Christmas nail designs still in style?
Yes, 3D nails with bows, gems, and holiday shapes are very popular for Christmas 2025.
5. When should I book my holiday nail appointment?
Book your appointment at least 2 weeks before Christmas, as salons fill up quickly during the holiday rush.

Emma Grace is a creative contributor to Squad Burst, blending her love for fashion and sports into captivating content. Her fresh perspective and relatable voice make her a favorite among readers who share her passion for style and athleticism.